Toad-in-a-Hole

Isn’t it amazing how food can evoke a memory? An emotion? One bite can bring you right back to the place that you first tasted the delectable delight. So, it is for me and the infamous ‘toad-in-a-hole’.   I had my first taste in Australia. The trip of a lifetime with each moment solidly etched in my brain. My dear friend Catherine made them for us one morning at her home in Adelaide.

toad-in-a-hole

We grew up with what we referred to as ‘dunkin’ eggs’. We loved my mom’s basted eggs and loved dunking our toast in the runny yolks even more. At the risk of showing my slightly weird side, I like to eat the surrounding egg white first and then dive into the yolk. When I was little, I would take my fork and push down gently until the yolk squirted out. It was a test in pressure and fun to watch it burst. (Sometimes I still do that!)

I recently introduced my children to the ‘toad-in-a-hole’ and they LOVE it. My daughter asked for ‘toad-in-a-hole’ four nights in a row, for dinner! When asked what her favorite food is…you guessed it!  Toad-in-a-hole.  It is so simple and easy, and healthy too.


Here are my very basic steps for Toad-in-a-Hole:

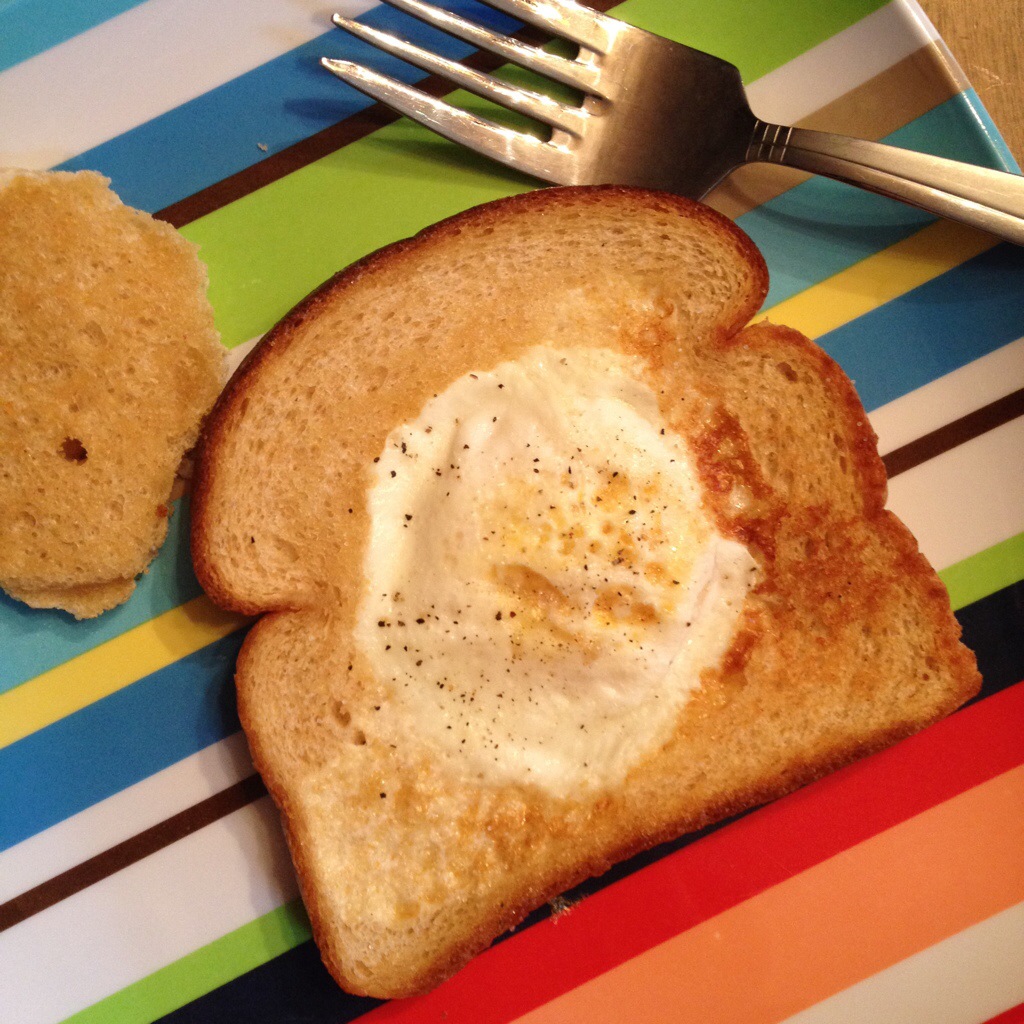
Choose your bread.  You can use any variety you prefer. We have enjoyed with our standard whole wheat but have also delighted in the flavor of sourdough. Generously melt butter in cast iron pan and turn heat to medium-low.  Cut a hole in a slice of your choice of bread with a biscuit cutter or upside down glass.  Lay the bread in the pan.  I put the circle part in the pan too.  Let it toast a bit in the butter and then crack an egg in the hole you created in the slice of bread.  Salt and pepper to your liking.  Give it a good minute or so and then carefully flip so that the other side of the egg has a turn.  You can cook to your liking for the yolk, runny or all the way through or anywhere in between.  I also flip the circle here too so it gets nicely toasted on the other side.  Remove from pan and serve.

Side Note:  I have switched entirely to cast iron but you can use whatever pan you normally use to make eggs.  I swear food TASTES better and I can’t believe I didn’t make the switch sooner.  Old school is the way to go.  😉

If you are looking for a new take on your egg and haven’t had the pleasure of this simple dish, I invite you to try it.

While names abound, I prefer to call it ‘toad-in-a-hole’ as it was first served to me by my kind and gracious Aussie friend.

Thanks Catherine – for bringing me back Down Under with a simple breakfast dish.  Cheers!


Advertisement

Gorgeous Buns

buns

I love bread. Love. If I were forced to choose one category of food to eat for the rest of my life, it would be bread. If I were stranded on a desert island but could have just one thing to eat, it would be bread. If I were given the chance to break one thing, it would be bread. With friends, of course. (Ha!) The baked goodness of fresh bread is soul-nourishing in every way. Of course, I may end up weighing a wee bit more on the scales than I would consider soul-nourishing…But I’d be happy. Fat and happy. Yes, it would be bread that would be my chosen food companion for the rest of my days.

Dearest Bread, I declare thee winner of the one food I would eat for the rest of my life. Amen.

Please understand that my brain is now going to the logistical arena where it is saying doubtful and dreadful things like, “Yeast? On a desert island? What about an oven to bake the bread?”. But you and I both know this is not reality. It’s just a pretend fantasy of mine where I must choose one food that I love. When I made these gorgeous buns, they reaffirmed my love, and my daydreams of being stranded on a desert island with all the bread-making ingredients I would ever need and all the ovens I could ever want. There would be no scales to weigh the inevitable pounds that would creep on with each loaf. Furthermore, there would be no people to see the breaded, up-sized version of me that would surely follow.

My family has enjoyed these buns with spicy pulled pork and also with hamburgers and all the fixings. They would be delightful served on their own as an accompaniment to a meal. They are also very quick and super easy to make. So, if you are in need of a bread fix or a bun to go with your favorite dish, read on for the recipe. It is extremely likely that all of the ingredients already reside in your pantry, which is why if you don’t have buns but need a bun…Voila! (Plus, I am secretly looking for people to join me in my Fantasy Bread Land.)

Special thanks to Jessie McKenney on Taste of Home for sharing this recipe with the world.

40-Minute Buns

Ingredients
• 2 tablespoons active dry yeast
• 1 cup plus 2 tablespoons warm water (110° to 115°)
• 1/3 cup vegetable oil
• 1/4 cup sugar
• 1 egg
• 1 teaspoon salt
• 3 to 3-1/2 cups all-purpose flour

Directions
• In a large bowl, dissolve yeast in warm water. Add oil and sugar; let stand for 5 minutes. Add the egg, salt and enough flour to form a soft dough.
• Turn onto a floured surface; knead until smooth and elastic, about 3-5 minutes. Do not let rise. Divide into 12 pieces; shape each into a ball. Place 3 in. apart on greased baking sheets.
• Cover and let rest for 10 minutes. Bake at 425° for 8-12 minutes or until golden brown. Remove from pans to wire racks to cool. Yield: 1 dozen.

Delighted Dreamer of All Things Bread –

Honey Beer Bread

I’ve got a small secret to share. On New Year’s Day when I made the spinach dip, my oven already had an occupant basking in its warmth – this glorious Honey Beer Bread.

honey beer bread

Which is why when I discovered the frozen spinach in my freezer, I had a serious lightbulb moment. Some of my best spinach dip experiences have involved a good hearty bread as an accompaniment. So, knowing this was already in the oven, I was compelled to make the dip. I didn’t have a choice. The force was too great. The pull too strong.  Thankfully, the dip was a success with altered ingredients and this beautiful, hearty bread arrived on the scene with delightful hints of honey and malt. Together, they made the first day of 2013 a tasty one.

Here is the lovely recipe from lululuathome.com to make one loaf…

Ingredients:
3 cups all-purpose flour
1 tablespoon baking powder
2 tablespoons sugar
1 teaspoon salt
2 tablespoons honey
1 can or bottle of beer
1/4 cup unsalted butter, melted

Directions:
Preheat over to 350F. Grease a 9″x5″x3″ loaf pan. Line the bottom of the pan with parchment paper. Set aside.

In a medium bowl, whisk together the flour, sugar, baking powder and salt.

Using a wooden spoon, stir the beer and honey into the dry ingredients until just mixed.  (Microwave the honey for 5 to 10 seconds beforehand to make it easier to stir in)

Pour half the melted butter into the loaf pan. Then spoon the batter into the pan, and pour the rest of the butter on top of the batter. Use a pastry brush to spread it around.

Bake for 50 to 60 minutes, until top is golden brown and a toothpick/knife inserted in the middle comes out clean.

Ang’s Note: The batter will be bumpy, giving texture on the top and creating nice crevices for the butter to bake in.